The problem with estimating
Most negative conversion works from the image: it reads each frame’s statistics — white point, black point, average colour — and estimates a correction. That approach fails in exactly the situations that fill real rolls.
- Scenes without neutral content drift. A red room, a forest, a sunset — average-to-grey logic reads the scene itself as a colour cast and corrects it away.
- Mis-exposed frames are corrected toward the wrong target. Over-exposed frames come out bright and desaturated; night shots get lifted to grey.
- Frame-by-frame analysis drifts frame by frame. Two photos taken seconds apart render differently because something in the scene changed the histogram.
A calibrated roll has no per-image auto-balance. Every frame converts through a fixed, measured calibration, so a result can be reproduced exactly — frame to frame, roll to roll, operator to operator. For film with no calibration, Obelisk has a separate engine that does estimate, the way a lab printer does: Lab auto.
What Obelisk measures
A short calibration session — a colour chart photographed on one roll of the stock, bracketed in one-stop steps — captures how that film responds on your light and your camera.
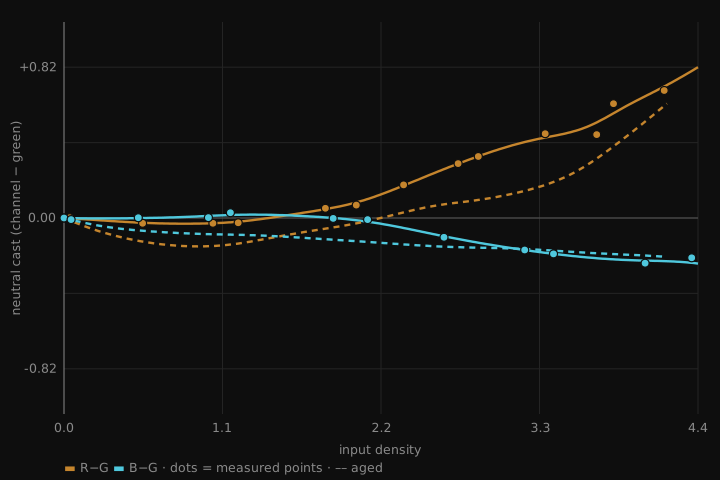
Neutral at every density
Dozens of measured points along each channel’s response, across ±3 stops. Grey reads grey in the shadows, midtones and highlights — removing the casts that a single white balance move can never fix.
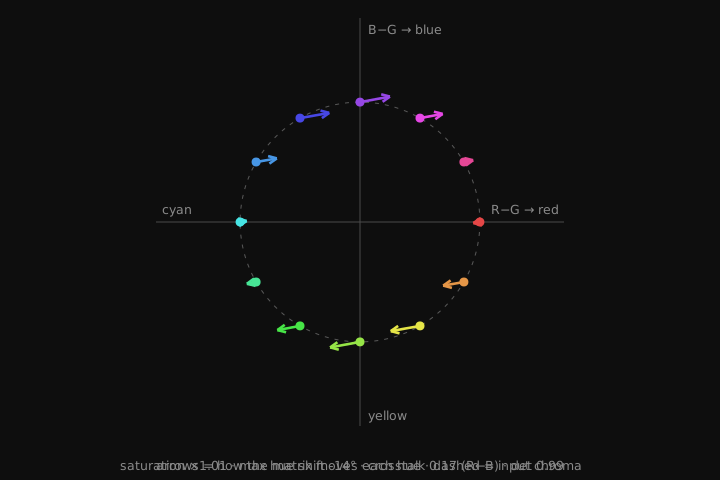
Gated colour correction
The chart’s colour patches fit a cross-channel correction for the overlap between the film’s dyes and the camera’s filters. It must preserve neutrals and pass statistical quality gates, or it is not used.
The film’s own zero
Each roll’s unexposed base is measured from the clear film between frames, agreed across the roll, and subtracted in density space. The orange mask and the scan light cancel exactly.
Arithmetic, not guesswork
On a negative, an exposure error is a uniform density offset. It is removed with a gain that preserves colour ratios, placing every frame at the same print density.
Density is the control
Brightness works the way a printer or minilab handles it: as print density. One control moves the frame through a fixed print curve with the blacks anchored — no black-point stretching, no re-fitted histogram. A density change on screen behaves like an exposure change at the enlarger, so contrast and colour hold while the frame gets lighter or darker.
 Density 0.00As graded
Each frame exported from Obelisk at nine Density settings, 0.25 apart and centred on the frame’s own grade. Nothing else changes between the steps.
The same maths runs in two places: on the GPU for live grading as you drag, and in the export path at full resolution. They are kept in parity, so what you approve is what you deliver.
Aged film, measured
Aged film — expired stock, or exposed rolls that waited years for development — does not simply fade. Its colour balance shifts unevenly across the tonal range: shadows drift toward magenta while highlights drift toward teal. Because the error bends with density, no white-balance move can remove it. Auto-balancing converters average the two casts against each other and leave both in the frame.
Obelisk calibrates the same stock twice — once fresh, and once from film deliberately aged before development — capturing how ageing bends each channel’s response at every density. The correction is a single per-roll control: zero is the fresh calibration, and raising it applies the measured ageing shift in reverse until the roll’s neutrals line up. Shadows and highlights return to neutral together, because the correction follows the same curve the ageing did.
Scanning light, measured at the sensor
Cameras apply large white-balance gains to raw data before you see anything — on our body, ×2.6 on red and ×1.6 on blue. A light that looks balanced on the camera’s histogram or in Capture One can leave red and blue well short of the sensor’s range. Tuning the light against raw, gain-free sensor values fills every channel, which leaves headroom for dense film and dense frames.
Raw red level at clear film base, before and after tuning
White-balance gains on red and blue, applied before any histogram or clipping warning
Measured white density — red now resolves to the top of its range
White light, RGB or separate exposures
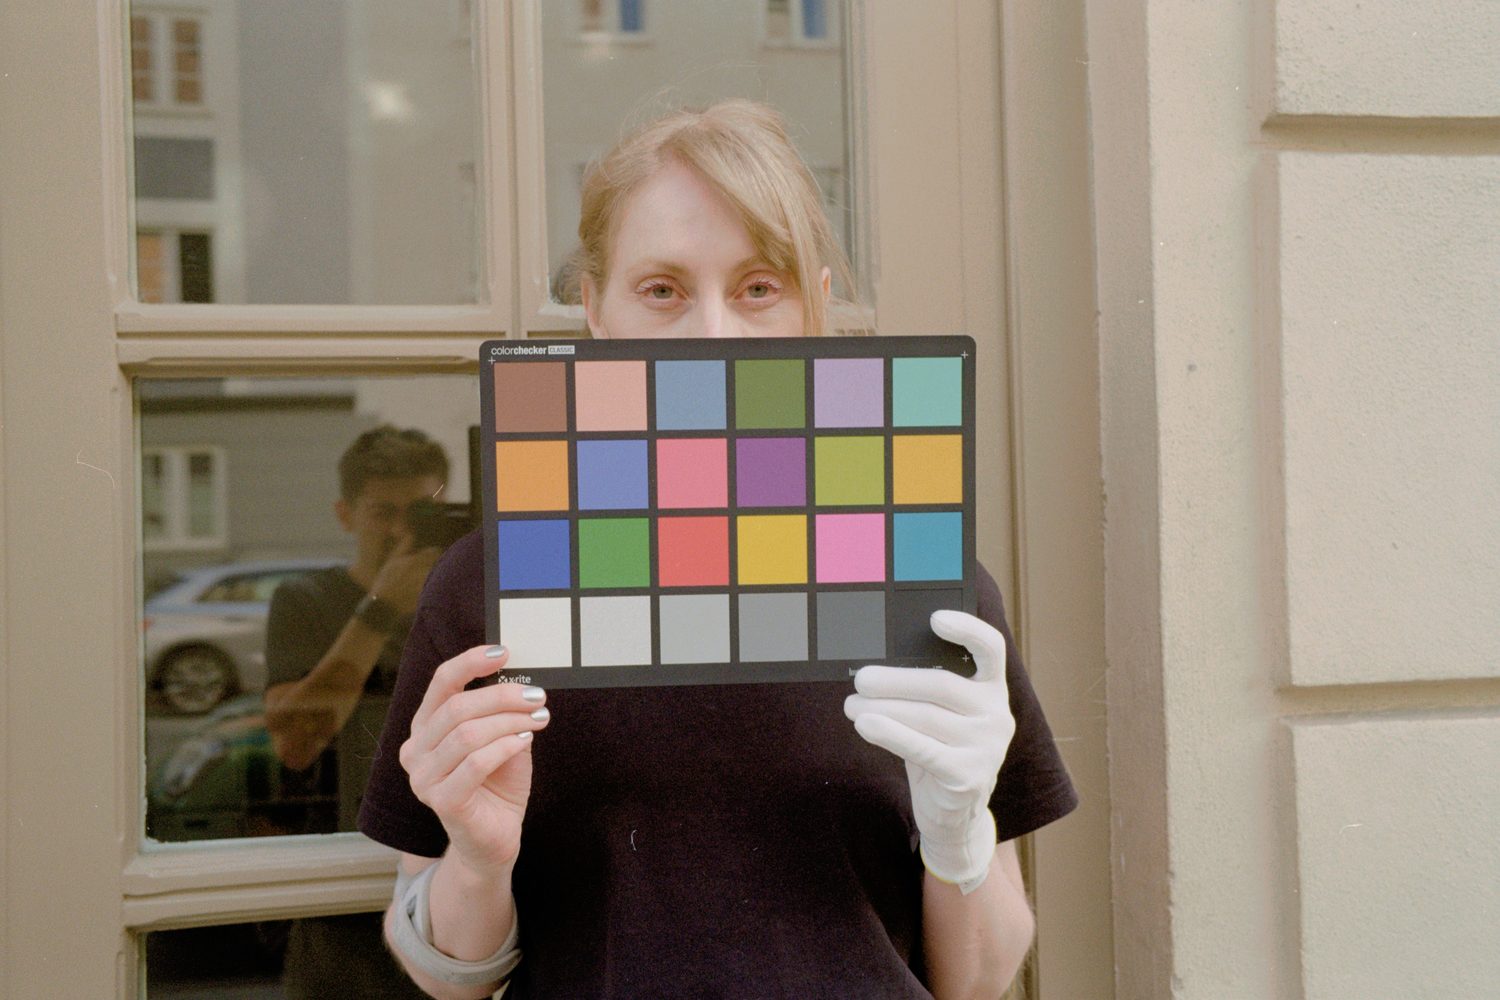
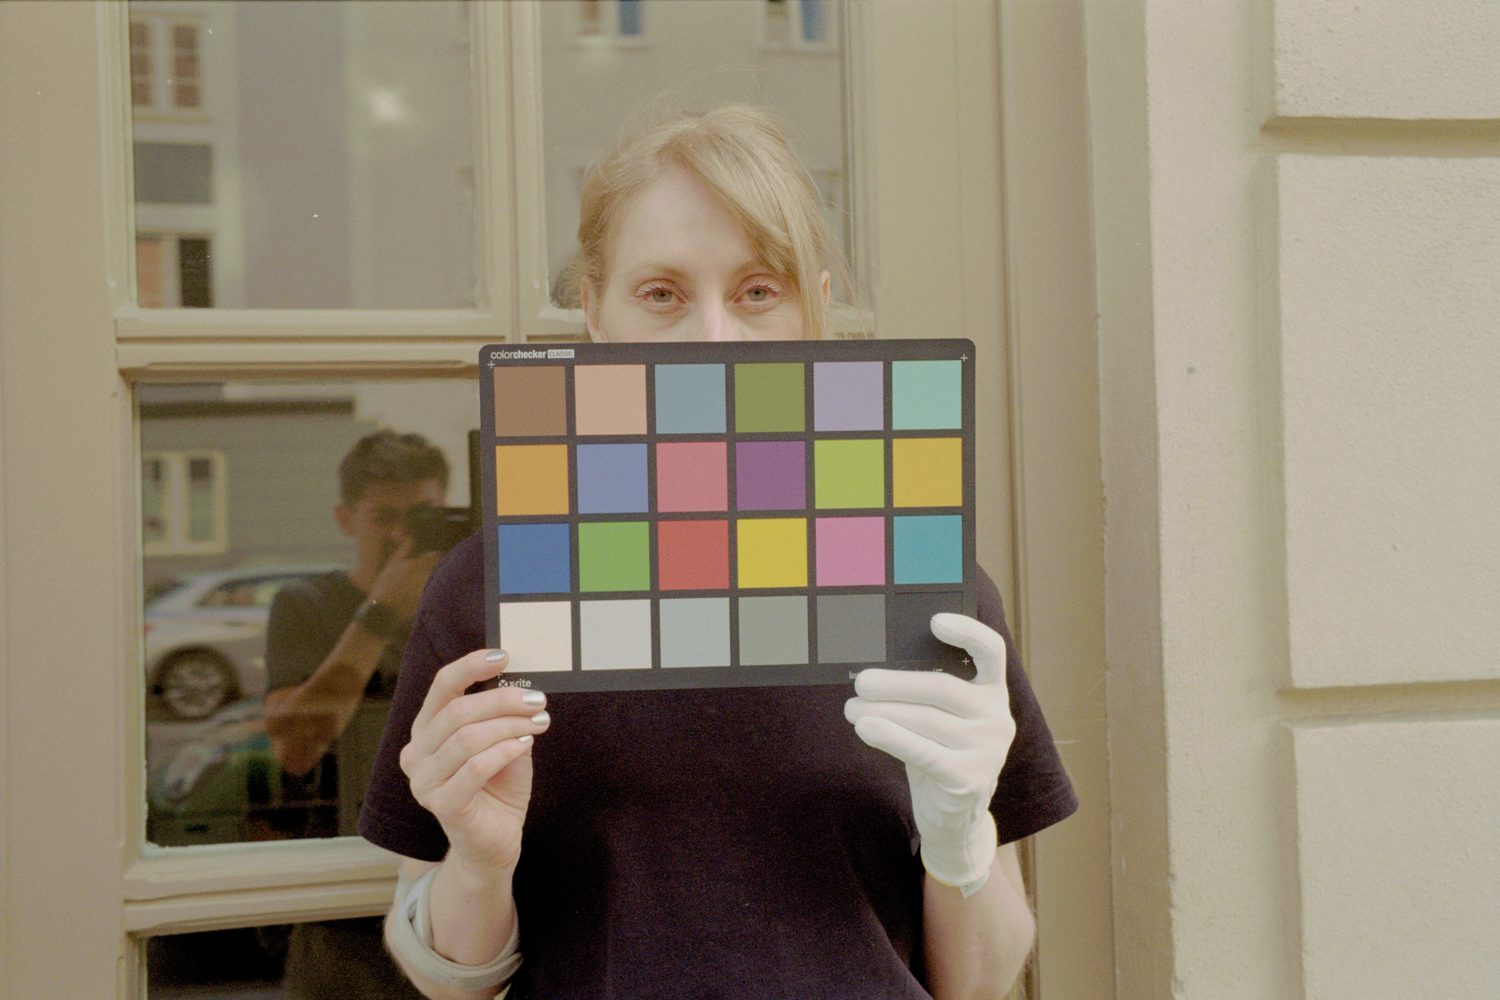
None of this makes an RGB source a requirement. Obelisk works with an LED panel or a light table, with an RGB light, and with separate red, green and blue exposures (trichrome), because calibration is measured for whichever light you actually use, and a white-light profile is as consistent across a roll as an RGB one. Measured on the same negatives scanned all three ways, a single RGB exposure resolved 13–26% more separation between colours than white light, and separate exposures 65% more — so RGB extracts more, but white light is a perfectly workable start.
Separate exposures take three frames per negative, and Obelisk merges them: right-click a roll of single-LED scans and choose Merge trichromes. Each frame becomes one raw DNG, every pixel taken unchanged from the exposure lit by its own colour, and the single-LED scans move to a Trichrome sources folder inside the roll. From there it calibrates and converts like any other scan. The full comparison is in RGB vs white light for film scanning, measured.
One rule holds regardless: a profile belongs to a light source as well as a film stock, and separate exposures count as a light of their own. Scanning the same stock under a different light means one more five-minute chart session — and Obelisk flags a roll whose base signature doesn’t match its profile’s light.
Calibration in practice
Calibration is done once per film stock and light source, and takes about five minutes at the scanning station.
- Shoot a chart. Photograph a standard colour chart on one roll of the stock, bracketed in one-stop steps.
- Develop and scan the roll on your rig, exactly as you scan customer film.
- Point Obelisk at the bracket. It fits the fingerprint and colour matrix, checks the fit against its quality gates, and records the light, aperture and rig it was made on.
Profiles are portable bundles: back them up, move them to a second scanning station, or rebuild one from its stored chart measurements when the fitting improves — without rescanning.
Watch a whole calibration, from chart to finished roll (18 min) →
Lab auto: when there is no profile
Not every roll is a stock you have calibrated: a customer’s one-off film, an off-brand respool, a stock you scan twice a year. For those, a roll can be switched from Calibrated to Lab auto in its header. Lab auto is a second, separate engine, modelled on how minilab printers such as the Fuji Frontier and the Noritsu set up a negative: it measures every frame, decides, and then smooths its decisions across the roll.
It shares only the scanning side with the calibrated engine — RAW decoding, crop, film base, rotation, dust removal, rig calibration and export. None of the calibrated conversion runs on a Lab auto roll.
- Grey axis. Per frame, from the near-grey parts of the picture. Strong colours are removed first in three passes, the last growing out from each coloured area so a whole red car goes, not just its most saturated middle. Similar frames of the roll pool their evidence.
- Colour failure. A small final grey balance, held back when one colour fills the frame. A sunset or a tungsten-lit room keeps its colour instead of being corrected to grey.
- Density. An estimate of the scene, weighted toward the busy parts of the frame and its centre, printed at one aim. Thin frames are lifted and dense ones brought down. Flat frames get a little automatic contrast.
- Roll averaging. Each frame’s density, contrast and grey balance are averaged with up to three similar neighbours either side, stopping at the first frame that looks different. A run of similar shots prints alike.
- Local tone. Large bright areas such as skies are pulled down by their surroundings and dark ones lifted slightly; small highlights are left alone.
- Print. Saturation and a print curve to the output file.
No profile needed
Obelisk ships with a generic film for each type of scanning light, RGB and white, made from our own calibrations of Kodak Gold, Ultramax and Portra. A Lab auto roll needs nothing else, so it works on an installation with no profiles at all, and from a single frame. Frames are adjusted with the same Density, Temp, Tint and Contrast controls, live on the GPU like a calibrated frame.
There is one generic per light rather than one per stock because the light matters more. Measured on six white-light rolls, a generic film made from other stocks under the same light left about half the colour cast of the right stock’s profile made under RGB light.
Lab auto is not an emulation of a Frontier or a Noritsu. Their colour lives in the manufacturers’ own data files, which Obelisk does not use; every setting in Lab auto is our own, tuned on our own rolls. And because it decides frame by frame, the scene can still sway it. For a stock you scan every week, a five-minute calibration is the way to a roll that converts identically every time.
See the results on real frames
Bracket and real-scene comparisons against three other converters, from identical RAW files.